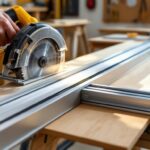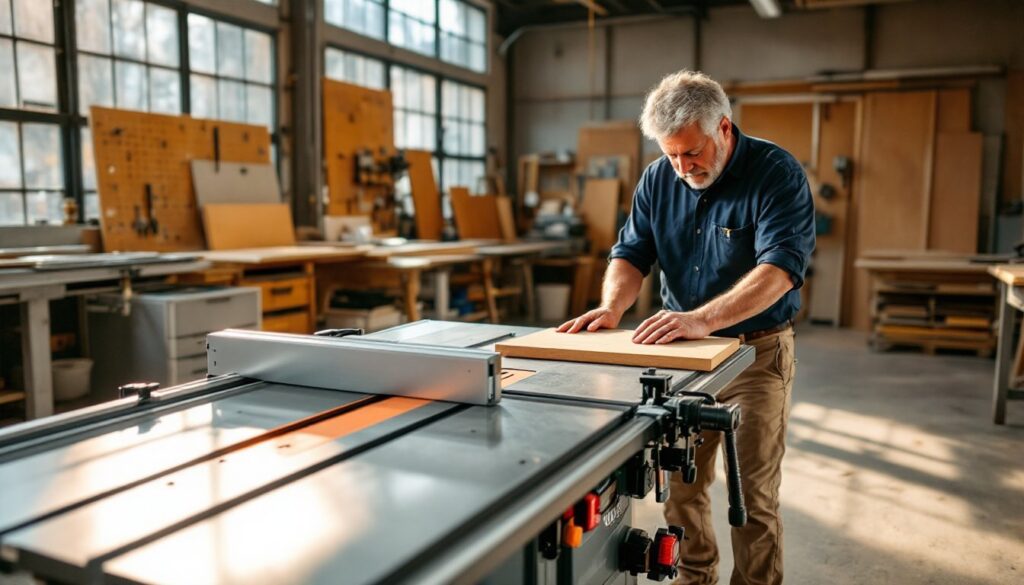

A reliable table saw fence is the difference between frustration and precision. A loose, misaligned, or inadequate fence leads to binding, kickback, and cuts that need endless sanding to fix. The fence guides every rip cut, crosscut jig, and dado operation, it’s the reference point for accuracy in your workshop. Whether you’re ripping plywood for cabinets or trimming hardwood trim, the table saw rip fence must lock square, stay parallel to the blade, and hold position under pressure. Many stock fences, especially on entry-level saws, fall short. That’s why aftermarket table saw fence systems are among the most popular upgrades for serious DIYers.
Key Takeaways
- A quality table saw fence is essential for precision cuts, repeatability, and safety—preventing binding, kickback, and material waste by maintaining parallel alignment with the blade.
- The two main fence styles are T-square fences (lightweight, easier to install, best for mid-range saws) and Biesemeyer-style fences (dual-rail design offering rock-solid stability and the best aftermarket table saw fence for demanding joinery work).
- Proper installation requires careful alignment to the miter slots and blade—measuring parallelism to within 0.002 inches—followed by test cuts to verify accuracy before critical projects.
- Common fence issues like drift during cuts, flexing, and measuring inaccuracy can be diagnosed and fixed through maintenance checks on locking mechanisms, bolt tightness, rail cleanliness, and parallelism verification.
- Budget $150–$300 for entry-level T-square upgrades or $400–$700 for premium Biesemeyer systems, and prioritize compatibility, rip capacity, aluminum construction, and micro-adjust features when selecting your upgrade.
- Regular maintenance—cleaning rails, checking bolts quarterly, and re-verifying alignment after heavy use—keeps your table saw fence system accurate and extends its lifespan for years of reliable workshop performance.
What Is a Table Saw Fence and Why Does It Matter?
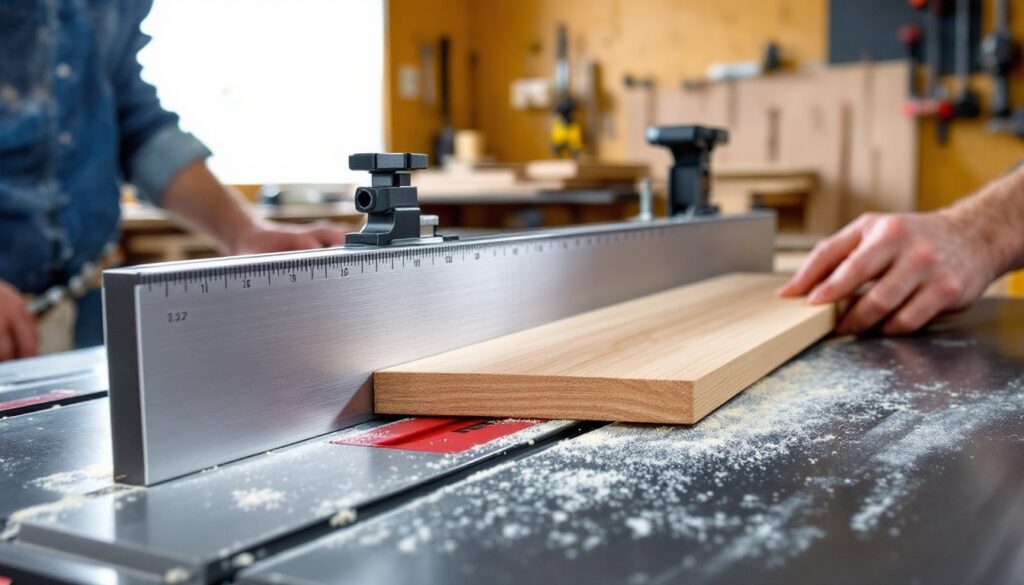
A table saw fence is a straight metal or aluminum rail that runs parallel to the blade and clamps to the table surface. It provides a reference edge for guiding workpieces during rip cuts, cuts made along the length of the board. Without a fence, you’d be eyeballing every cut, which is neither safe nor accurate.
The fence locks in place at a set distance from the blade, ensuring consistent width on every piece. For jobs like ripping sheet goods, building face frames, or batch-cutting drawer sides, repeatability matters. A quality fence system includes a front and rear rail, a locking mechanism (usually a cam lever), and micro-adjust controls for dialing in measurements down to 1/32 inch.
Poor fences cause several headaches: they drift out of parallel during a cut (leading to binding and potential kickback), they flex under side pressure, or they don’t lock securely. Budget contractor saws often ship with stamped-steel fences that rack easily. Upgrading to a best aftermarket table saw fence system can transform a mediocre saw into a precision tool.
Safety note: Always wear safety glasses and hearing protection when operating a table saw. Keep hands at least 6 inches from the blade, and use push sticks for narrow rip cuts.
Types of Table Saw Fences for Different Projects
Not all table saw fences are built the same. The two main styles dominate the market, each with trade-offs in accuracy, ease of use, and cost.
T-Square Fences
T-square fences mount to a single front rail and use a rear guide tube or no rear connection at all. The fence body forms a “T” shape when viewed from above, hence the name. When you lock the front clamp, the fence self-aligns square to the blade.
T-square designs are lightweight, simple to install, and less prone to racking than older styles that clamp front and rear independently. They’re common on hybrid saws and mid-range contractor saws. Examples include the Delta 36-T30T3 and the Shop Fox Classic fences. Many woodworking project plans recommend T-square fences for DIYers building furniture or cabinets, since they balance cost and performance.
The downside: T-square fences can flex if you lean into a heavy rip, and cheaper versions may creep out of parallel over time. Check squareness with a quality combination square before critical cuts.
Biesemeyer-Style Fences
Biesemeyer fences, named after the original patent holder, mount to both front and rear rails with a tube that rides in a channel. The front cam lever locks the fence rigidly in place. This dual-rail design delivers rock-solid stability, even when ripping 4×8 sheets of plywood or dense hardwoods.
Biesemeyer-style systems are considered the best table saw fence for accuracy and durability. They’re standard equipment on cabinet saws from SawStop, Powermatic, and Jet. Aftermarket options like the Vega Pro 50 and the Accusquare bring Biesemeyer performance to older contractor saws.
Installation is more involved, you’ll need to drill and tap mounting holes in the saw table and carefully align both rails. But once dialed in, these fences stay true for years. Micro-adjust knobs let you sneak up on final dimensions without loosening the main lock. If you’re serious about repeatability and plan to tackle workshop projects that demand tight tolerances, a Biesemeyer upgrade is worth the investment.
How to Choose the Best Table Saw Fence for Your Workshop
Shopping for a table saw fence upgrade means balancing budget, saw compatibility, and the type of work you do most. Here’s what to prioritize:
Compatibility: Measure your saw’s front rail length and table depth. Most aftermarket fences fit standard 27-inch-deep contractor and cabinet saws, but compact benchtop saws and European-style machines may require adapters or won’t accept aftermarket rails at all. Check the manufacturer’s fit list before buying.
Rip capacity: Common capacities are 30 inches (right of blade), 36 inches, and 50 inches. If you regularly rip full sheets of plywood, a 50-inch fence saves time and hassle. For trim work and small projects, 30 inches is plenty and keeps your footprint tight.
Material and rigidity: Extruded aluminum fences resist flex better than stamped steel. Look for a fence face at least 3 inches tall, taller faces provide better support for standing boards on edge. Avoid fences with thin walls or wobbly tubes.
Locking mechanism: Cam-style levers are fast and positive. Knob-style clamps take longer but allow finer control. Either works: just make sure the lock engages without wiggle.
Micro-adjust: A fine-adjustment wheel or screw lets you nudge the fence by thousandths without unlocking. Essential for joinery and box-building.
Measuring scale: Quality fences include a self-adhesive measuring tape on the front rail and a cursor or indicator on the fence body. Look for scales with 1/32-inch or 1 mm increments. Some systems include flip-down stops for repeatable cuts.
Budget $150–$300 for a mid-tier T-square fence (Delta, Shop Fox) and $400–$700 for a best aftermarket table saw fence system with Biesemeyer rigidity (Vega, Incra, Accusquare). Installation hardware, rails, and cursor are usually included: verify before ordering.
Installing and Aligning Your Table Saw Fence Correctly
Proper installation is crucial, even the best table saw fences won’t perform if mounted crooked. Set aside a few hours and gather a combination square, a reliable straightedge (at least 48 inches), a drill, taps (if required), and shims.
Step-by-step installation:
- Remove the old fence system. Unbolt the rails and any brackets. Clean the table surface with denatured alcohol to remove sawdust and oil.
- Mount the front rail. Position it parallel to the miter slots (not the blade, the slots are the true reference). Clamp it in place and check with a straightedge or by measuring from the slot to the rail at both ends. Drill pilot holes and bolt the rail down. Do not overtighten: you may need to tweak alignment later.
- Install the rear rail (Biesemeyer-style only). Align it parallel to the front rail using the fence tube as a spacer. Measure diagonally from front-left to rear-right and front-right to rear-left: equal diagonals confirm square. Drill, tap if needed, and bolt.
- Attach the fence body. Slide the fence onto the rails and lock it at mid-travel. Check that it’s perpendicular to the table using a combination square against the fence face and the miter slot.
- Align the fence parallel to the blade. Raise the blade fully. Lock the fence about 6 inches from the blade. Measure from the fence face to a blade tooth at the front of the blade, then rotate the blade by hand and measure the same tooth at the rear. The two measurements should match within 0.002 inches. If not, loosen the front rail bolts slightly and tap the rail left or right until parallel. Retighten and recheck.
- Install the measuring scale. Peel and stick the tape to the front rail, aligning the zero mark with the left edge of the blade (set the fence against the blade to find zero). Attach the cursor or indicator to the fence body.
- Test cuts. Rip a scrap board about 12 inches wide. Measure the width at three points along the cut. Variation greater than 1/32 inch indicates the fence is still out of parallel, go back and tweak.
For DIY repair tutorials and similar precision work, taking the time to get alignment perfect prevents tearout, binding, and wasted material.
Common Table Saw Fence Problems and Quick Fixes
Even well-maintained table saw fence systems develop issues over time. Here’s how to diagnose and fix the most common problems:
Fence drifts during a cut: This usually means the locking mechanism isn’t tight enough or the fence is out of parallel. First, check that the cam lever or knob engages fully, some fences have adjustment screws on the cam itself. If the lock is solid, re-check parallelism as described above. Worn or dirty rail surfaces can also cause creep: wipe down rails with a dry cloth and apply a thin coat of paste wax (not oil, which attracts dust).
Fence rocks or flexes: Inspect mounting bolts, loose hardware is the usual culprit. Tighten front and rear rail bolts evenly. If the fence tube itself flexes, the extrusion may be too thin for heavy work. Consider upgrading to a stiffer aftermarket system.
Measuring scale is inaccurate: Scales can shift if the adhesive fails or if someone bumps the tape. Re-zero the scale by setting the fence flush against the blade and aligning the zero mark. For critical work, always verify dimensions with a tape measure rather than trusting the scale blindly.
Fence won’t lock square: T-square fences rely on a single front clamp to pull the fence square. If it racks, check that the rear guide pin or tube isn’t binding or bent. Clean the guide channel and confirm the mounting holes aren’t wallowed out.
Cursor doesn’t align with scale: Most cursors have small adjustment screws or slots. Loosen, slide to the correct position, and retighten. If your fence lacks a cursor, you can add an aftermarket one or simply mark measurements with a pencil on the rail.
Regular maintenance, wiping down rails, checking bolts quarterly, and re-verifying parallelism after any heavy impact, keeps your table saw fence system accurate for years. And don’t overlook blade condition: a dull or warped blade can make even a perfect fence seem out of whack.